The starting point for any kind of user navigation is something you already know: simply pass all entry point classes to the RootFrame to make up the application's main menu. When you construct the RootFrame from code rather than from a Java call, you may also use alternative constructors. Details on that can be found in the class' Javadoc.
Once you have a domain object on the screen, the navigation to other objects is incredibly simple: whenever the user clicks a button and the corresponding domain object's method returns another object, this object is displayed on the screen.
Start the example from directory examples-firststeps/quickstart/navigate by the following command:
java gengui.infonode.RootFrame quickstart.navigate.CarsOverview quickstart.navigate.RegisterNewCar
This application demonstrates various basic navigation issues. First of all you will find two items in the main menu now, according to the two classes passed to the constructor. Click on the menu button Cars Overview to open up a table of all cars in the fleet. Initially it is empty. A table is displayed for every collection or array property. The mask has a button named New Car which does simply the same as the main menu button Register New Car. So the method's implementation is straight forward:
package example.hello; public class CarOverview { // ... rest of code omitted
public RegisterNewCar newCar() { return new RegisterNewCar(); } } |
As a difference to the application entry points, objects created from within the dialog flow may have parameters of course. There is no need for those in this very simple example, but feel encouraged to define meaningful constructors and final attributes where ever it is reasonable for a clean object-oriented design.
Now click the button New Car. By default the application runs in multi-window mode, i.e. the new object's mask is displayed on top of the initiating overview mask. The user can switch from one object to another by clicking the object names at the bottom of the application frame. The names make up a kind of task bar. Click on the Overview tab to bring the overview mask back on top and then click New Car again. A second car registration dialog opens up, so you got three objects on the screen now: the overview object and two cars under registration. As you learned already from the very first section, you may re-arrange and decouple the masks by dragging their title bars around.
Is it reasonable to have multiple car registration dialogs on the screen? Well, that's a matter of user requirements. When you click on the Cars Overview button from the main menu you will recognize a different behavior for this kind of objects. Instead of displaying another overview mask, the existing one is brought back to front. The important difference is the equals() method of that class. Whenever their appears a new domain object in the application, gengui checks whether it is the same (in the sense of an equals-match) as any of the objects being already displayed. If this is the case, the new instance is ignored and the existing one comes in focus.
What should happen when the user successfully finishes a car registration? There is no reasonable follow-up step much less a step which requires another mask. You could return a CarsOverview object from the register() method but the registration mask still stays on the screen. The easiest way to get rid of a mask is to annotate methods with the @Closer annotation. This tells the framework that the method denotes the end of a dialog flow and that the mask should be removed after successful method execution.
If you annotate a method with @Closer(Type.DEFAULT), the framework will execute the method when the user interactively closes the mask with the close button in the upper right corner. Leaving the method with an exception will then cause the mask to stay on the screen. You may use that e.g. to keep the user from loosing unsaved input.
Registering a car is currently a very simple interaction, so it's a candidate for a modal operation. You can easily modify you application for that by a simple method annotation:
package example.hello; public class CarsOverview { // ... rest of code omitted
@Modal public RegisterNewCar newCar() { return new RegisterNewCar(); } } |
Restart the application, open the overview mask and then press the New Car button. The result should look like this:
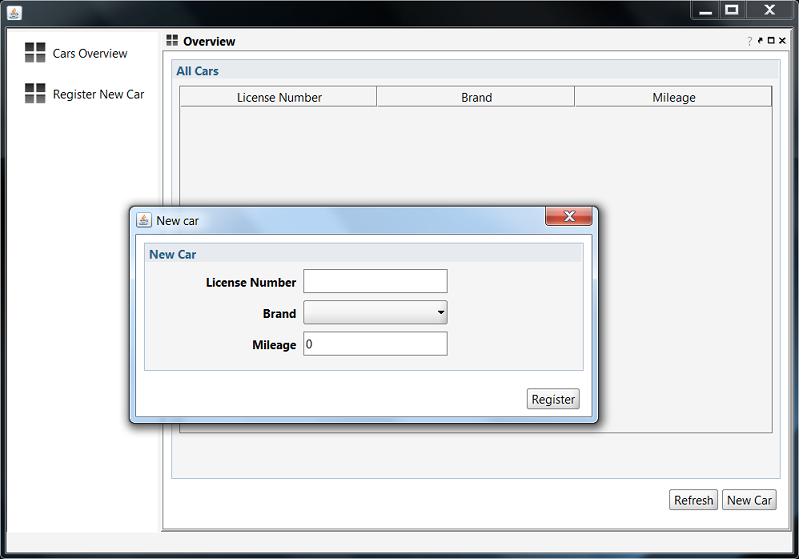
Pressing the Register button will cause the dialog to disappear. If the method behind the button in a modal dialog is also annotated with @Modal you will produce a wizard.
Created with the Personal Edition of HelpNDoc: Free EBook and documentation generator